The write-up will be covering the basics about android and how to set up an android pentesting lab also will be coming across the two vulnerabilities that are common in all android applications.
Android
Android is an open-source mobile operating system. As it is open-source, android is the first choice for developers as well as consumers.
Android Architecture
The Android Operating System is divided into 4 layers.
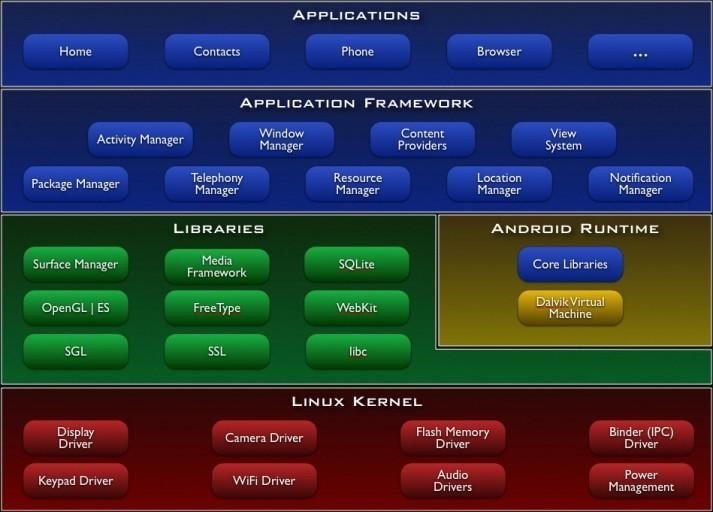
Application Layer
As shown above, the first layer is the application layer, In which all the applications are being installed on the mobile phone. It runs within the Android run time with the help of the classes and services provided by the application framework.
Application Framework
The Application Framework layer provides many higher-level services to applications in the form of Java classes. Application developers are allowed to make use of these services in their applications. Content providers and activity managers are examples.
- Content Provider : The content Provider component supplies data from one application to others on request. You can store the data in the file system, an SQLite database, on the web, or any other persistent storage location your app can access. Through the content provider, other apps can query or even modify the data (if the content provider allows it). Content Provider is useful in cases when an app wants to share data with another app.
- Resource Manager : Provides access to non-code embedded resources such as strings, colour settings and user interface layouts.
- Notifications Manager : Allows applications to display alerts and notifications to the user.
- View System : An extensible set of views used to create application user interfaces.
- Package Manager : The system by which applications can find out information about other applications currently installed on the device.
- Telephony Manager : Provides information to the application about the telephony services available on the device such as status and subscriber information.
- Location Manager : Provides access to the location services allowing an application to receive updates about location changes
Dalvik Virtual Machine | Android Run Time
- Dalvik Virtual Machine : is specifically designed by the Android Open Source Project to execute applications written for Android. Each app running on the Android device has its own Dalvik Virtual Machine
- Android Runtime (ART) : is an alternative to Dalvik Virtual Machine which has been released with Android 4.4 as an experimental release, in Android Lollipop (5.0) it will completely replace Dalvik Virtual Machine. A major change in ART is because of Ahead-of-Time (AOT) Compilation and Garbage Collection. In Ahead-of-Time (AOT) Compilation, Android apps will be compiled when the user installs them on their device, whereas Dalvik used Just-in-time(JIT) compilation in which bytecode is compiled when the user runs the app. Moving to the last one, these are common.
Libraries
These are external libraries which are used for additional features or additional functions.
- Surface Manager : This manages the windows and screens.
- Media Framework : This allows the use of various types of codecs for playback and recording of different media.
- SQLite : This is a lighter version of SQL used for database management.
- WebKit : This is the browser rendering engine.
- OpenGL : This is used to render 2D and 3D contents on the screen properly.
Linux Kernel
This layer is responsible for allocating hardware for the applications. And this layer contain all the drivers.It provides Android with several key security features, like
- A user-based permissions model
- Process Isolation
- The ability to remove unnecessary and potentially insecure parts of the kernel.
Security Architecture
Android security architecture consists of two models. They are:
- Linux Security Model
- Android Security Model
Linux Security Model
The Linux security model is were each app runs through a unique Linux user ID. Linux helps in isolating applications from each other.

Here you can witness that it’s inside the package folder of the application diva that is installed on the virtual device. The system has formed a user id (u0_a74) for every resource that is inside the package. So if there is any malicious application in the device they can’t affect or access other applications.
Android Security Model
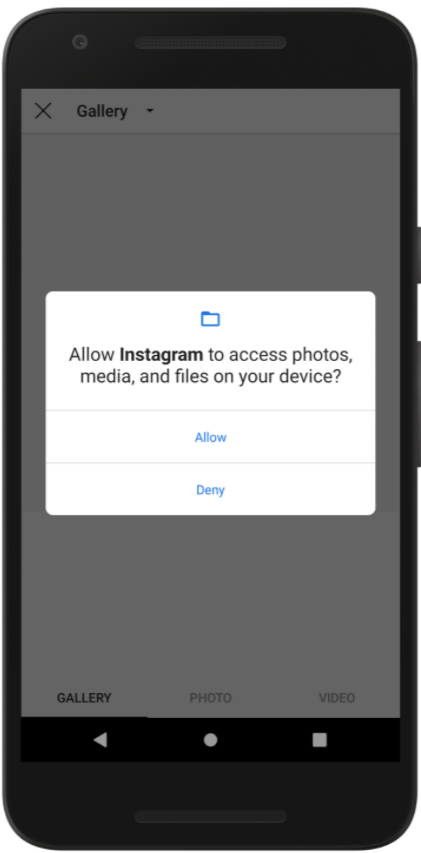
In the android security model, the user’s privacy is protected by means of permissions. We all are familiar with the image shown above, we allow some of the permission that the application asking for. The permission is required by the application id declared in the AndroidManifest.xml file.
So, what is AndroidManifest.xml?
What is an APK?

AndroidManifest.xml
The AndroidManifest.xml file is the control file that tells the system what to do with all the top-level components (specifically activities, services, broadcast receivers, and content providers described below) in an application. This also specifies which permissions are required. This file may be in Android binary XML that can be converted into human-readable plaintext XML with tools such as android apktool.
META-INF directory
- MANIFEST.MF : the Manifest File.
- CERT.RSA : The certificate of the application.
- CERT.SF : The list of resources and SHA-1 digest of the corresponding lines in the MANIFEST.MF file.
classes.dex
The classes are compiled in the dex file format understandable by the Dalvik virtual machine.
lib
The directory containing the compiled code that is specific to a software layer of a processor, the directory is split into more directories within it:
- armeabi : compiled code for all ARM-based processors only
- armeabi-v7a : compiled code for all ARMv7 and above-based processors only
- x86 : compiled code for X86
- mips : compiled code for MIPS processors only
res
The directory containing resources not compiled into resources.arsc.
assets
A directory containing application’s assets, which can be retrieved by AssetManager.
resources.arsc
A file containing precompiled resources, such as binary XML, for example.
Setting up a lab
Prerequisites:
- Genymotion
- Virtualbox
- Kali Linux

If you have already installed virtualbox on your pc then download Genymotion from the second option or if you have not installed virtualbox then download genymotion with virtualbox.
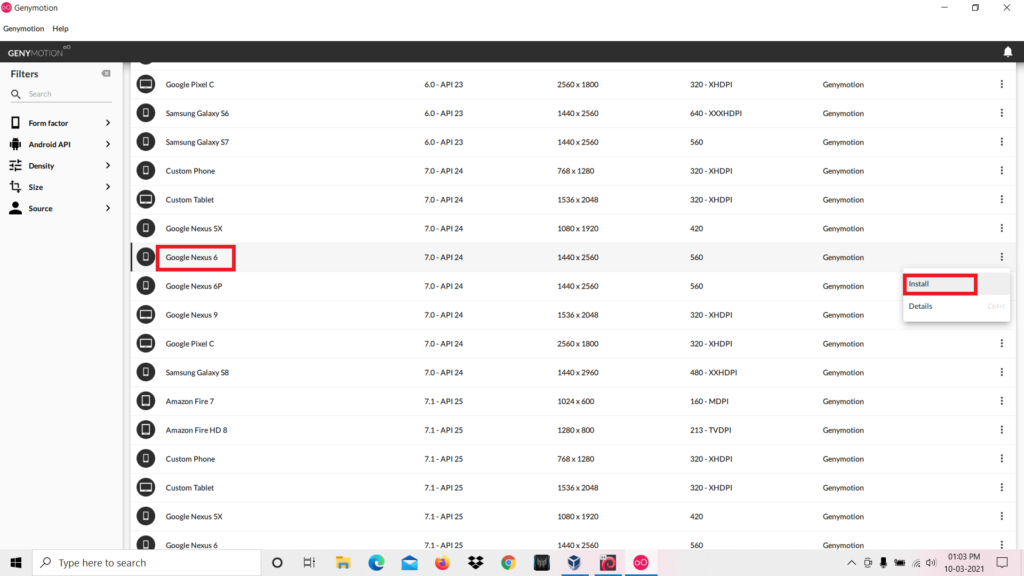
After completing the installation you have to download any virtual device. We choose to download Google Nexus 6. After that click the install button.

It’s time to customize your device. You can set the Network mode and other settings as you wish or you can follow the same settings shown in the above image. After completing, click install and wait until the installation to be completed.

We have almost gone across the processes for the completed setting up of the virtual device. The next step is to install Google Play Store on your virtual device, to do that click on the “OpenGapps” icon and the download will be started. After the installation is completed you can reboot the device.
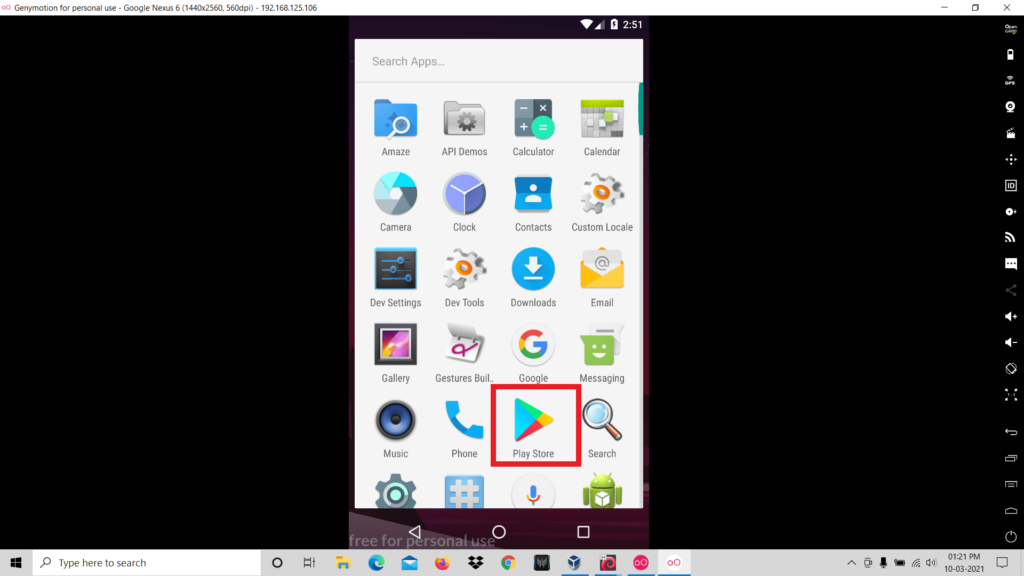
Configuring virtual device with Burp suite
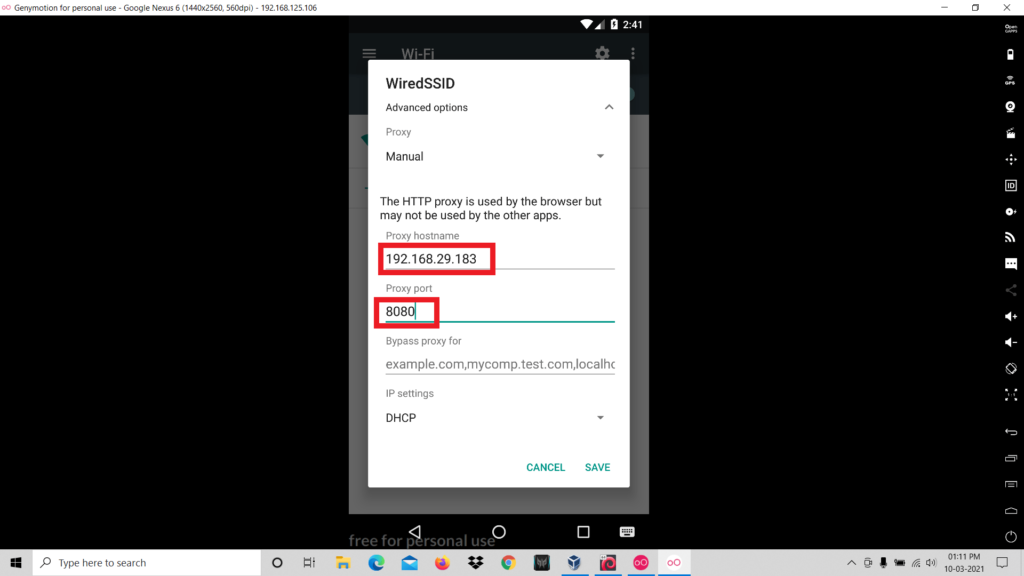
So firstly you have to configure the proxy settings of the virtual device .
- Go to the wifi settings of the virtual device.
- Long Press on the SSID of the wifi network.
- Click on “Modify Network”.

- Now click on the “Manuel” to set the ip and port.
- Now we have to identify the ip address of our kali linux. In order to do that type “ifconfig”
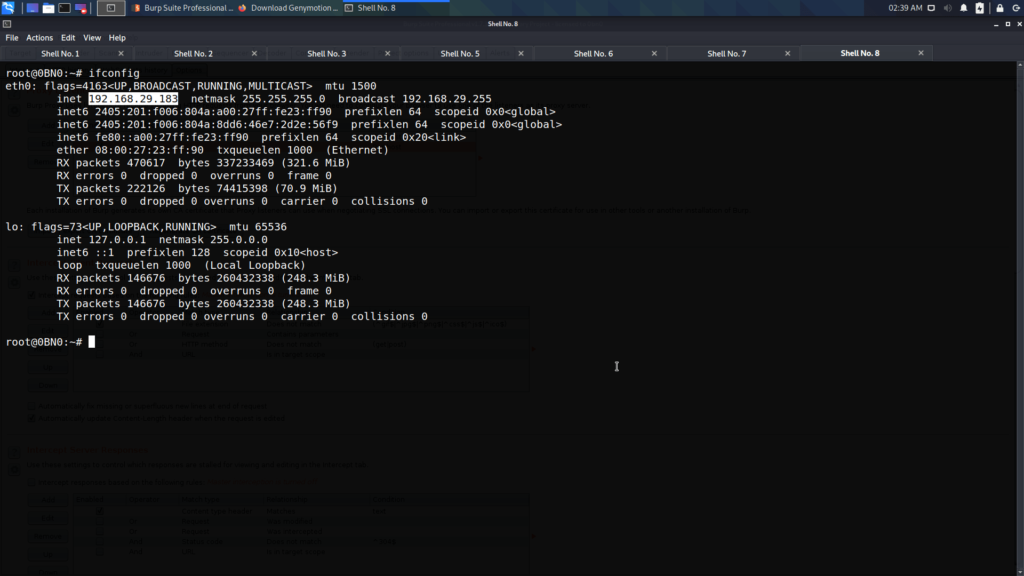
- Next we have to set the ip address of our kali linux and any port number in the wifi settings.
- The next step is configuring Burp suite. Open Burp suite > Proxy > Options.
- Add a new proxy listener.
- Change the Port number to the same port number that is specified in the proxy settings of the virtual settings.
- And change the “Bind to address” to “all interfaces”.
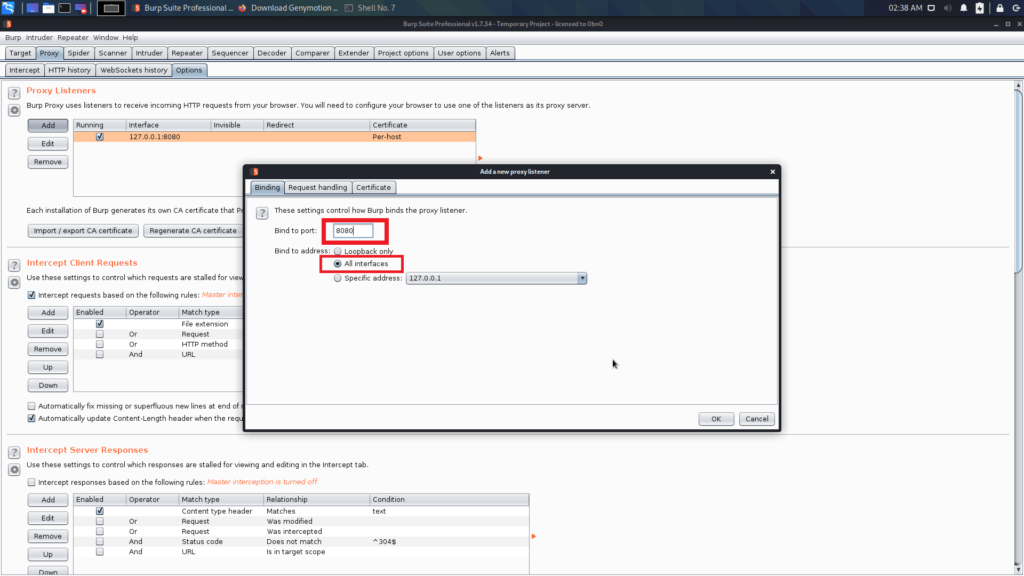
Now you completed the configuration in the Burp Suite.
The last step is to add a cacert to the virtual device.
- Open any browser and visit the following link: http://burp
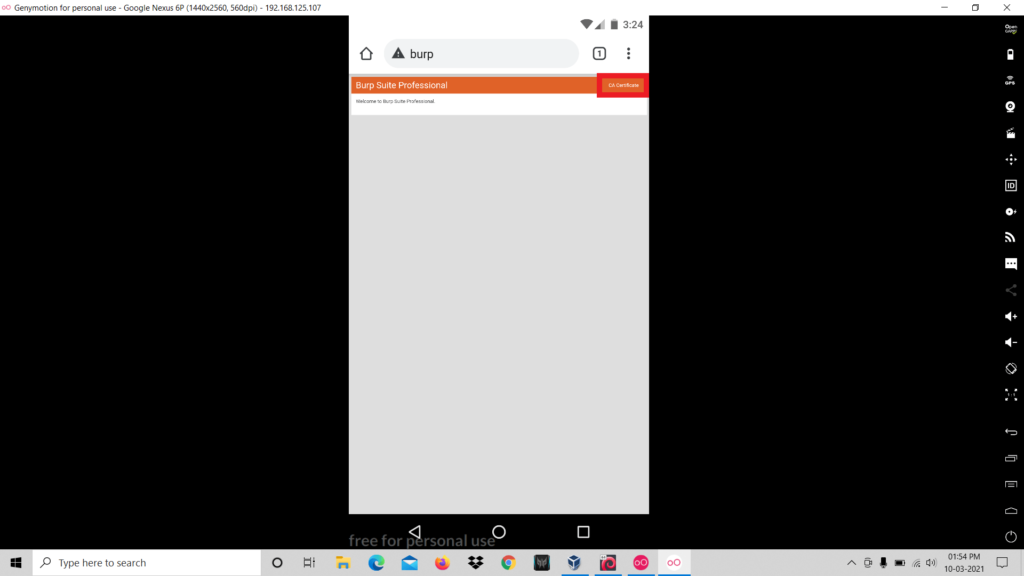
- Download the CA Certificate.
- Rename the certificate name from cacert.der to cacert.cer.
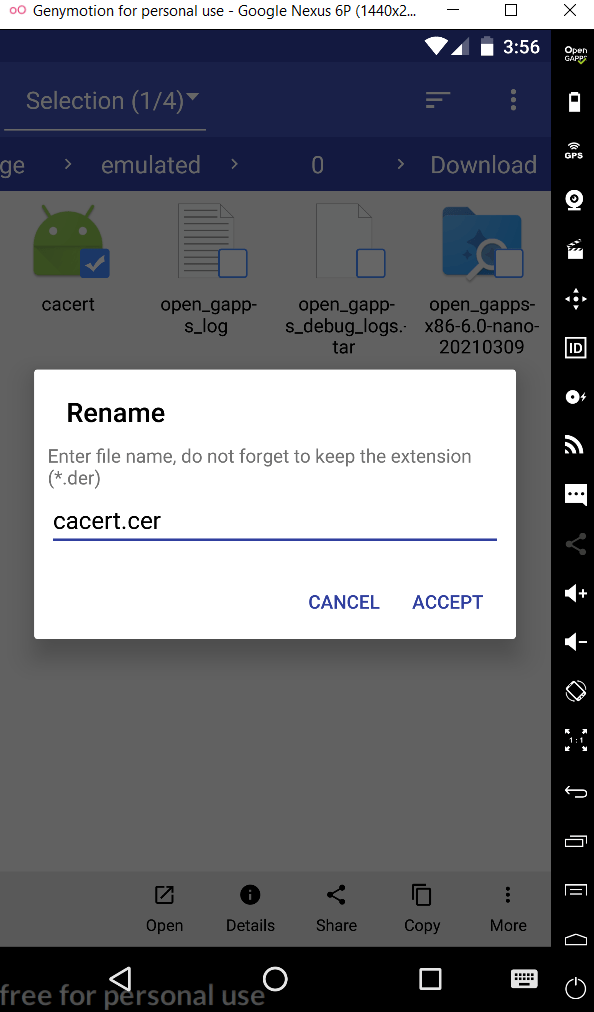
- Now go to Settings > Security > Install From SD Card and select the .cer file
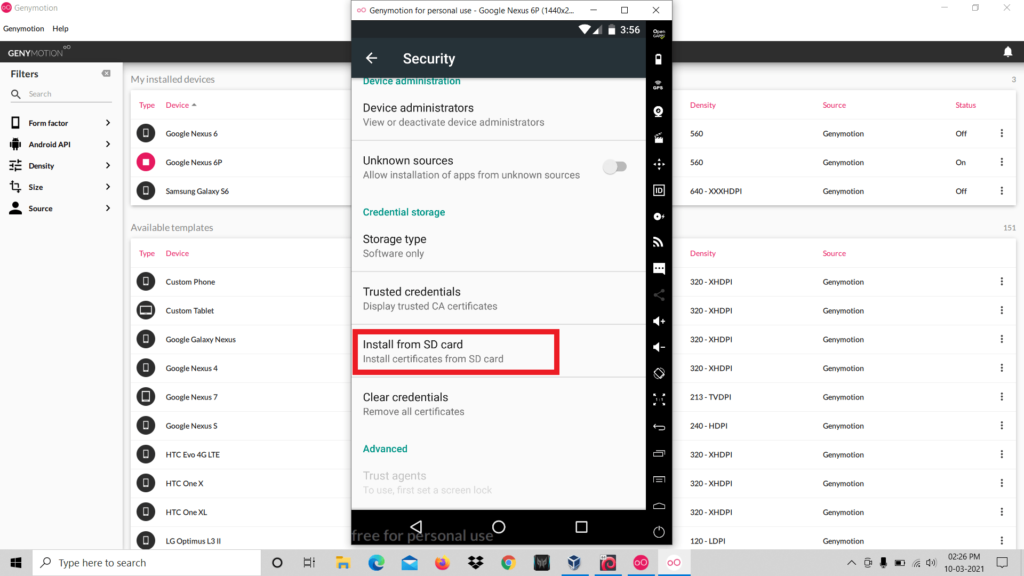
- Set any name for the file and click ok.
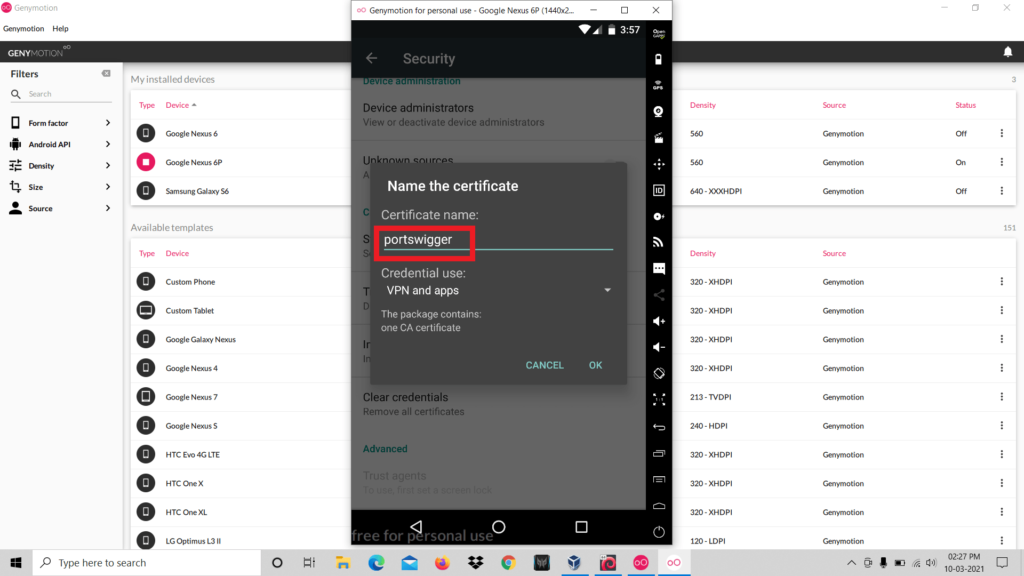
- So now the certificate installation is completed.
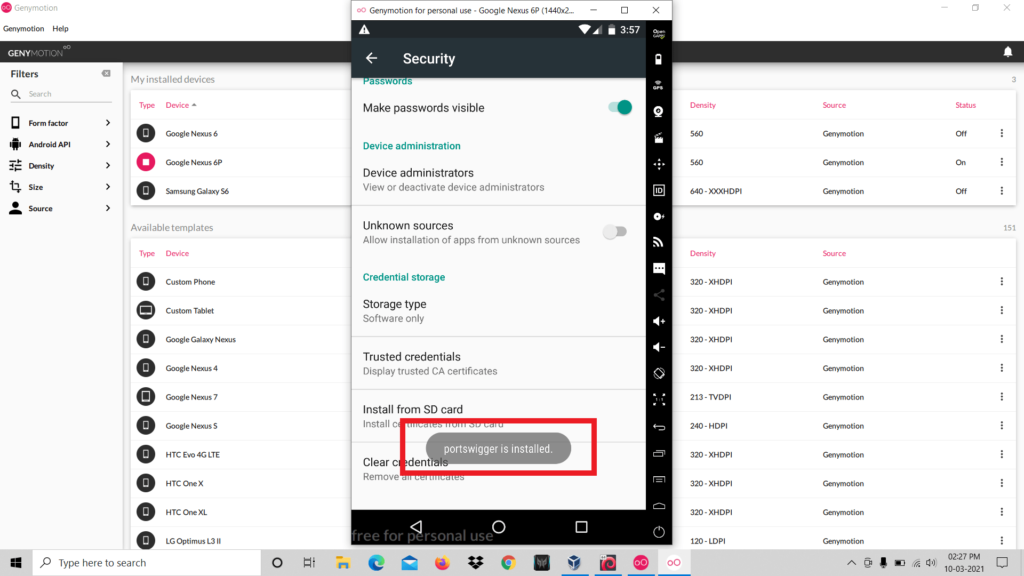
- Now you have completed all the configuration that is required for setting up the penetration testing lab.
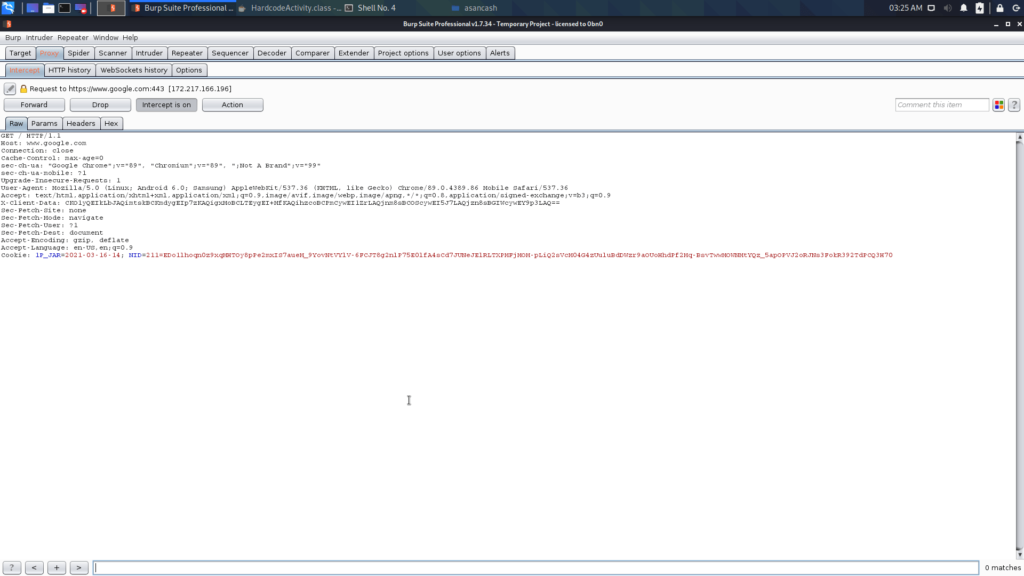
Perfect! We successfully captured the requests from the virtual device.
Practical Time 🙂
Let’s discuss two vulnerabilities that have a high chance to be found in real world applications.
1. Hardcoding Issues
Hard-coding issues means developers hard-code some sensitive strings inside the source code. Hardcoded data might be password, access token etc..
Now we are going to connect to the device using adb.
adb connect [ip address : port]
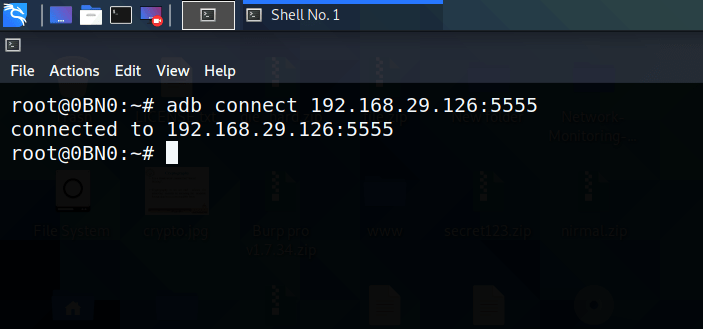
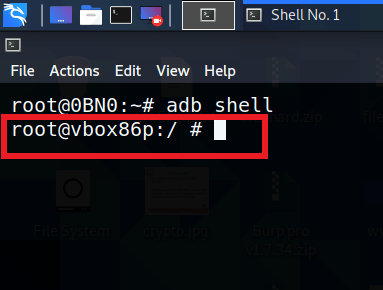
You have successfully connected with the device. Next thing is to get the shell of the device. In order to do that run the following command:
adb shell
We are going to practice the testing on the application named DIVA (Damn Insecure and Vulnerable Application).
As you can see, diva is already installed in my device.
You can install apk using adb, for that use the following command:
adb install diva.apk
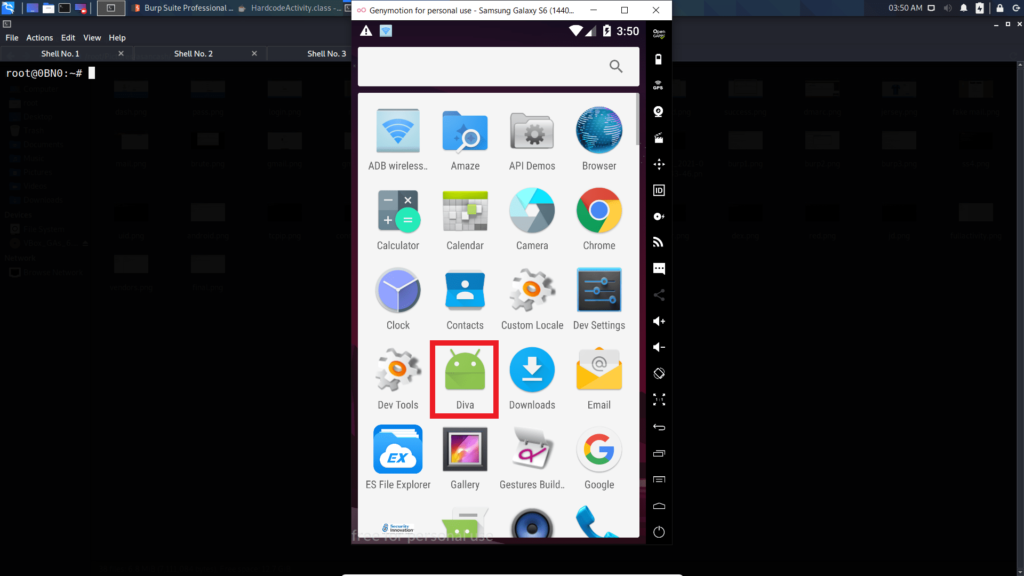
Now open diva app and click on the challenge named Hardcoding Issue Part 1.

So it is asking for a key for the users to access. When you type any value and click access it shows access denied.
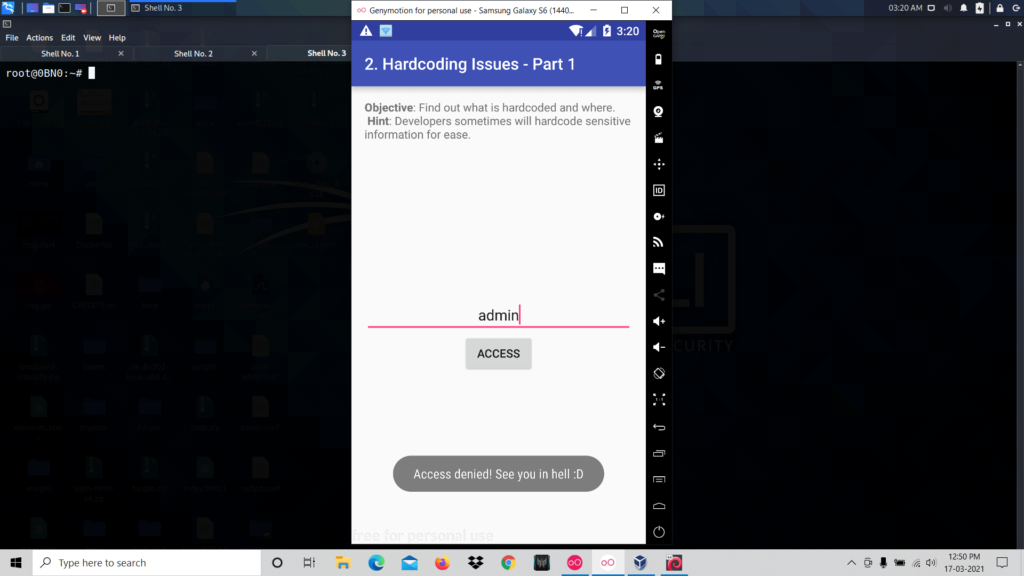
So now you have to inspect the source code of the activity.
First, you need to unzip the apk.
unzip diva-beta.apk

As the next step, you have to read the contents inside the file “classes. dex” but it is not in a human-readable format. The next step is to convert the dex file to jar format, to do that you can use the d2j-dex2jar tool.
d2j-dex2jar classes.dex
After executing this command there will be a new file in .jar format.

After executing this command there will be a new file in .jar format.
jd-gui classes-dex2jar.jar
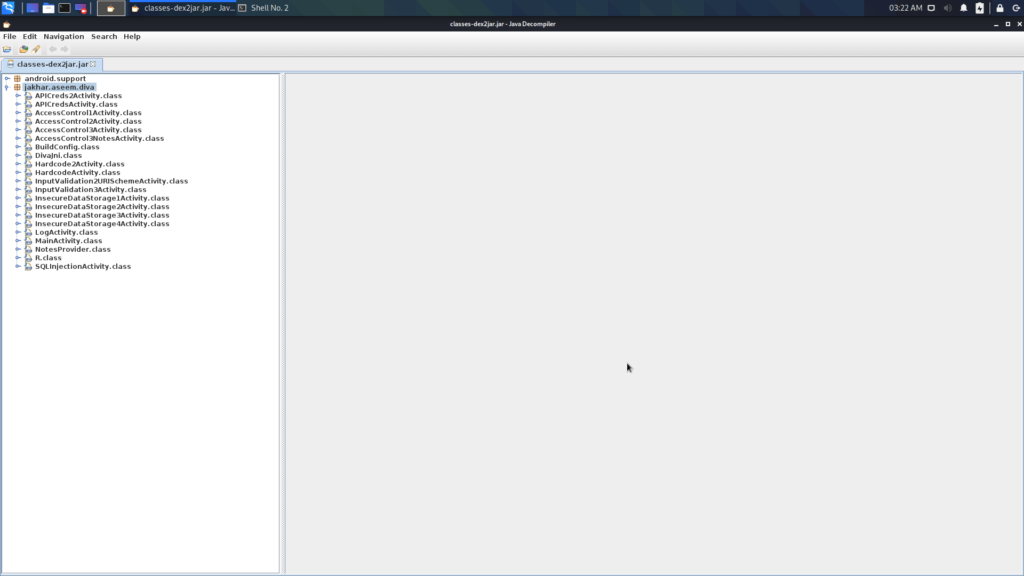
Here you can find the source code of every activity that is in the application. You are here to inspect the source code of the Hardcoded Issue, so open the corresponding file:
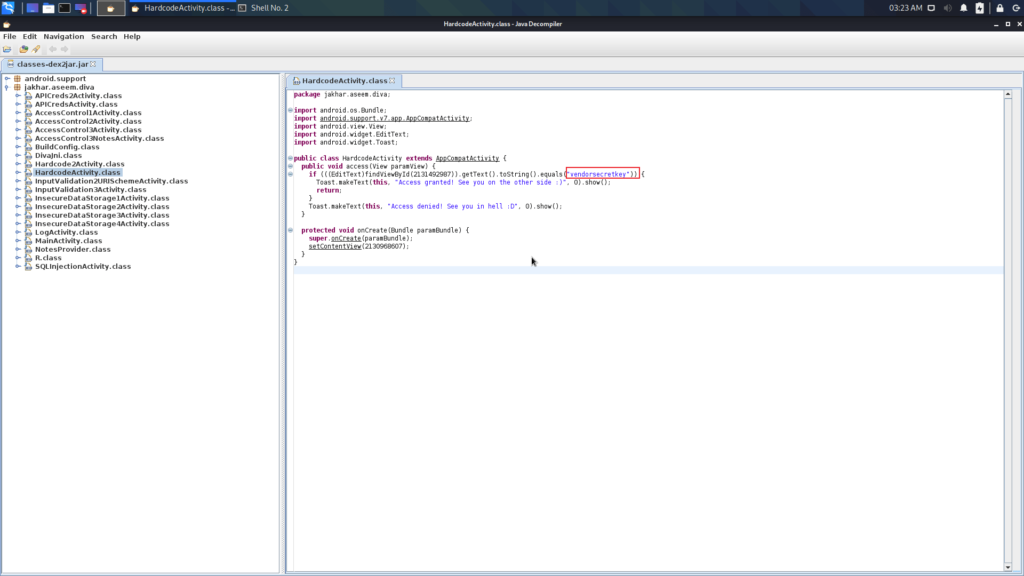
Here you can see that the developer hardcoded a sensitive string in the source code. So when the user enters any value in the box it validates with this key.
Now let’s enter this key in the box and see what happens.
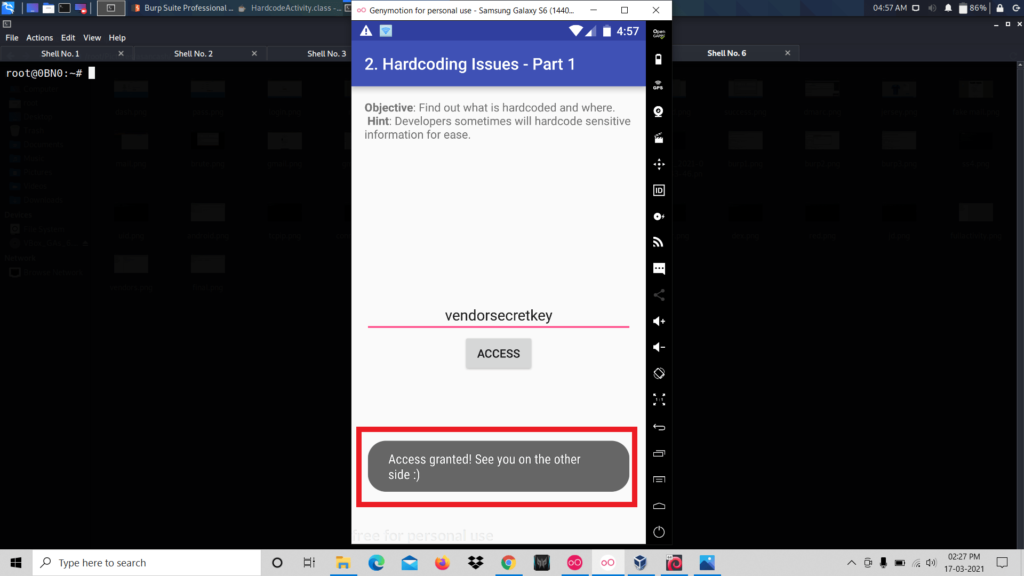
These types of security vulnerabilities are known as Hard-coding Issues. That’s all about Hard-coding issues. Now you have to move to another vulnerability.
2. Insecure Data Storage
Insecure data storage means sometimes developers store sensitive information without encryption. Here the issue is storing user’s data like passwords, tokens in plain text cause any other application reads those sensitive data.
Let’s practice this on the diva.
We have opened the Insecure Data Storage challenge in diva.

Now we can save our credentials. For that, we entered a username and password and click save.
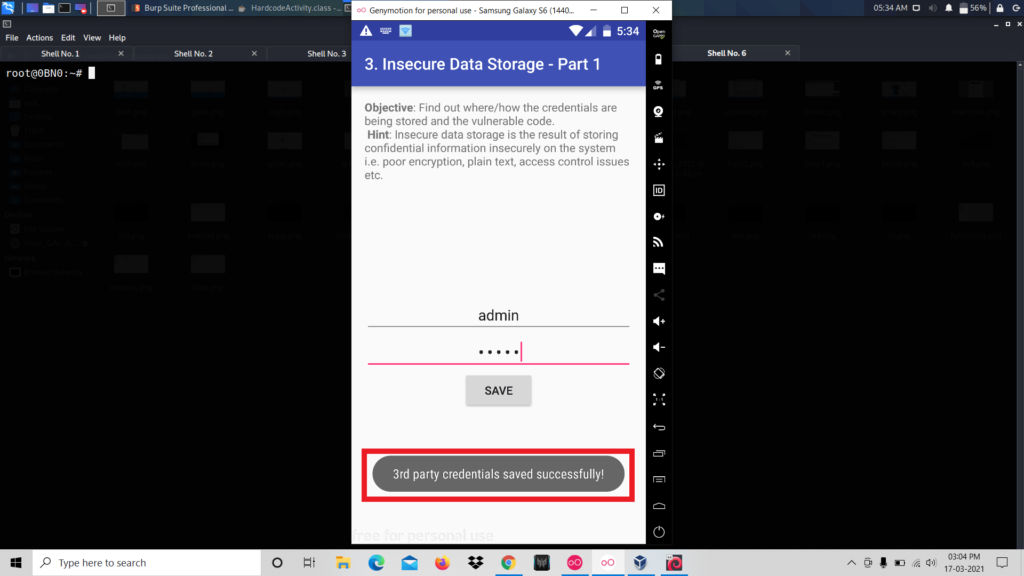
It says that credentials are saved successfully. Now let’s inspect the source code of the activity. To do that repeat the process we did the last challenge. That is open the .jar file using jd-gui.

We can see that the credentials are stored in the SharedPreferences folder.
So let’s navigate to that folder.
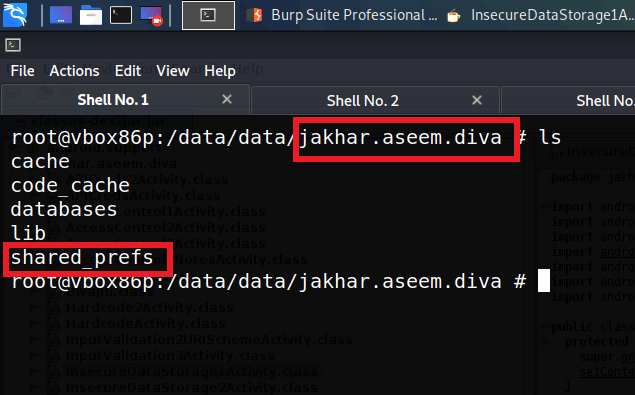
Now we are inside the package folder of the application diva. Inside this folder, there is the folder that we are looking for that is “SharedPreferences”. The source code of this application says that the credentials are stored inside this folder.
The next step is inspecting the contents of this folder.
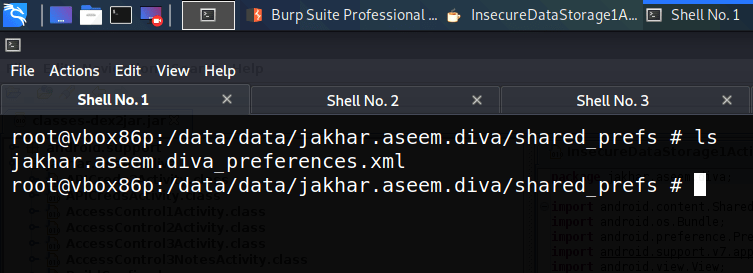
We can see that there is one xml file. Let’s read the contents of this file
cat jakhar.aseem.diva_preferences.xml

Here we can see that the credentials that are entered are stored in plain text and also in insecure locations.

